
Guide · Host your website yourself
Host your website yourself: VPS, domain & HTTPS — what you do and why
Your own server for a few euros a month, your domain pointing at it, plus HTTPS with the lock icon. This guide walks you through step by step — and explains at every step why it's needed.
Last updated: 14 August 2026
Step 1
What is a VPS — and why your own server?
For people to see your website on the internet, it has to live on a computer that runs around the clock. You rent that space. There are three typical routes:
Shared hosting
You share one server with many others. Cheap and simple — but you can only do what the provider allows. Installing your own programs? Usually not.
VPS
A virtual server of your own: you get an isolated area with full access — for roughly €4–8 a month. The sweet spot between freedom and effort.
Big cloud
Maximally flexible, but complex and with hard-to-predict costs. Completely oversized for a start.
Why your own server? Because it keeps you in control: your data lives on your server, in a location of your choice, under your rules — you don't depend on the goodwill of a website-builder company. And along the way you learn how the internet actually works. That knowledge stays with you, wherever your project grows.
Step 2
Rent a VPS
Renting takes only a few minutes. I've hosted with Hostinger for years myself — affordable, fast, with servers in Germany. What you need:
- Plan: the smallest VPS is enough to start — 2 vCPUs and 8 GB of RAM handle a WordPress site easily (with room to grow).
- Operating system: choose Ubuntu 24.04 LTS. LTS means "Long Term Support" — the system gets security updates for five years, so you don't have to rebuild all the time.
- Server location: pick Germany/Europe — short loading times for your visitors and fewer GDPR headaches.
After ordering you receive two things: your server's IP address (e.g. 203.0.113.10) and a root login — "root" is the administrator account that may do everything (which is why you should treat it carefully). You'll use it later to log in to the server via the terminal.
Affiliate link
Affiliate link: if you sign up through this link, I receive a small commission. It doesn't cost you anything extra — and you support my work.
Why not the biggest plan right away? A server can be scaled up later with a few clicks. Starting small saves money — and a freshly launched website needs surprisingly little power.
Why Ubuntu LTS? Ubuntu is the most widely used server system. Almost every guide on the internet (including this one) builds on it — so you'll always find help.
Step 3
DNS: pointing the domain at the server
Important to understand: your domain and your server are two separate things. You rent the domain from a registrar (e.g. also Hostinger), the server from the hosting provider. They're connected via DNS — the "Domain Name System". Think of it as the internet's phone book: people remember names (your-domain.com), computers need numbers (the IP address). DNS translates.
You create two records at your registrar:
- A record
@→ your server IP: "A" stands for address;@means "the domain itself". That's how the internet knows where your-domain.com lives. - CNAME
www→ your-domain.com: a pointer so thatwww.your-domain.comarrives too.
DNS changes aren't visible everywhere immediately: servers around the world cache answers. For how long is controlled by the TTL ("Time to Live") — e.g. 1 hour. This distribution period is called propagation: minutes to hours, depending on the TTL. Here's what that looks like for real:
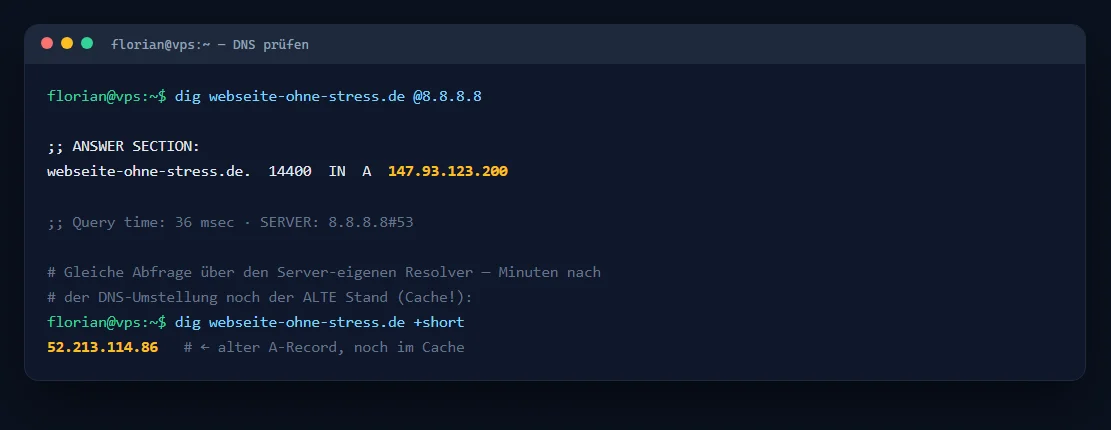
Why does DNS exist at all? Because nobody wants to type IP addresses. Even more importantly: you can switch servers later without anything changing for your visitors — you simply put the new IP into the phone book, the name stays the same.
Step 4
Web server & HTTPS: one door for everything
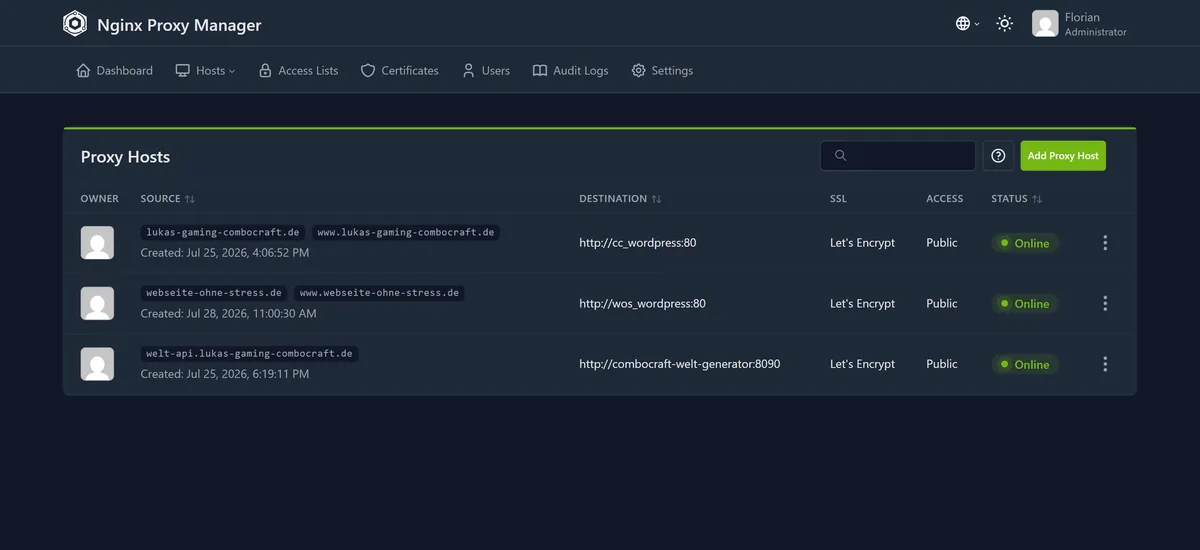
Your server often runs more than one program — WordPress, maybe more services later. So that not every service needs its own door to the internet, you put a reverse proxy in front: it accepts all requests from outside and distributes them internally to the right service. One door for everything — and HTTPS is handled right at that door.

A reverse proxy sounds complicated, but it doesn't have to be: the Nginx Proxy Manager (NPM) comes with a browser interface — you click instead of writing configuration files. Here's what that looks like in practice:
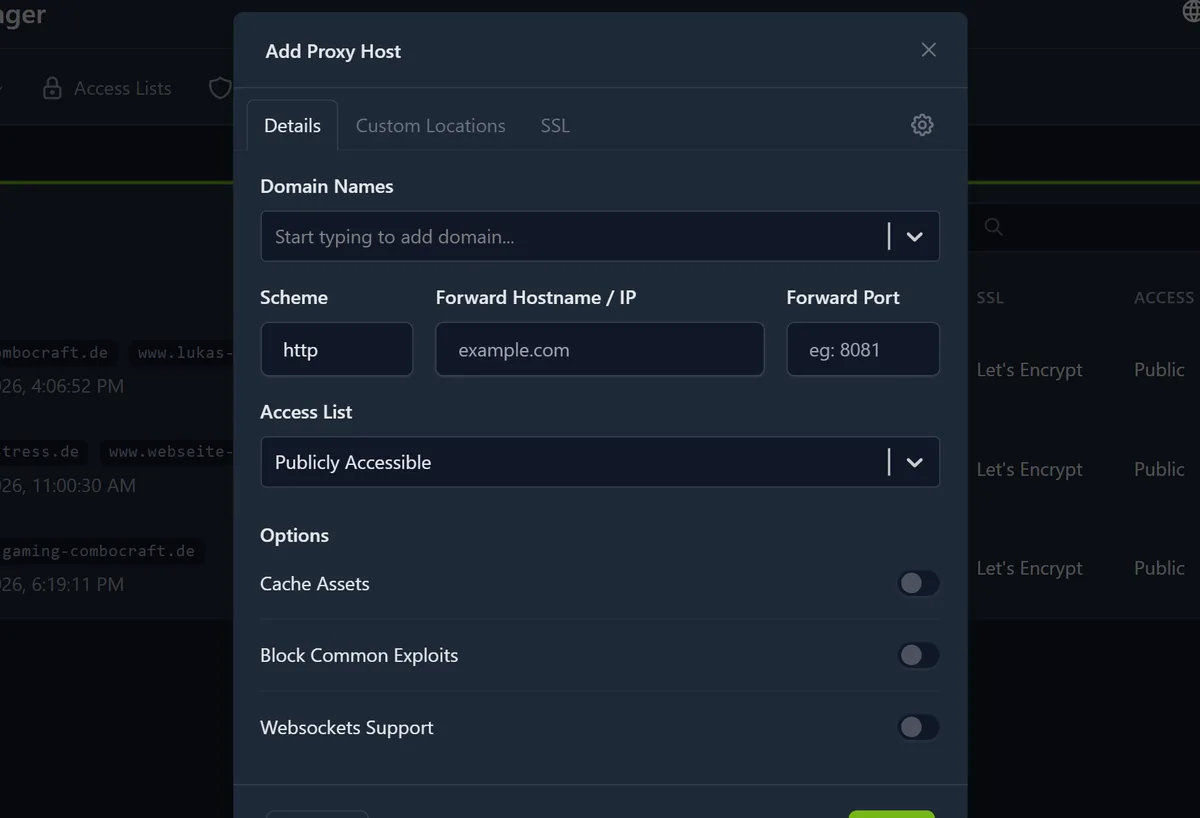
And HTTPS? In the same tool, on the SSL tab: one click on "Request a new Certificate" — NPM fetches and installs the certificate from Let's Encrypt fully automatically. Let's Encrypt is a non-profit certificate authority: free, certificates are valid for 90 days and get renewed automatically before they expire.
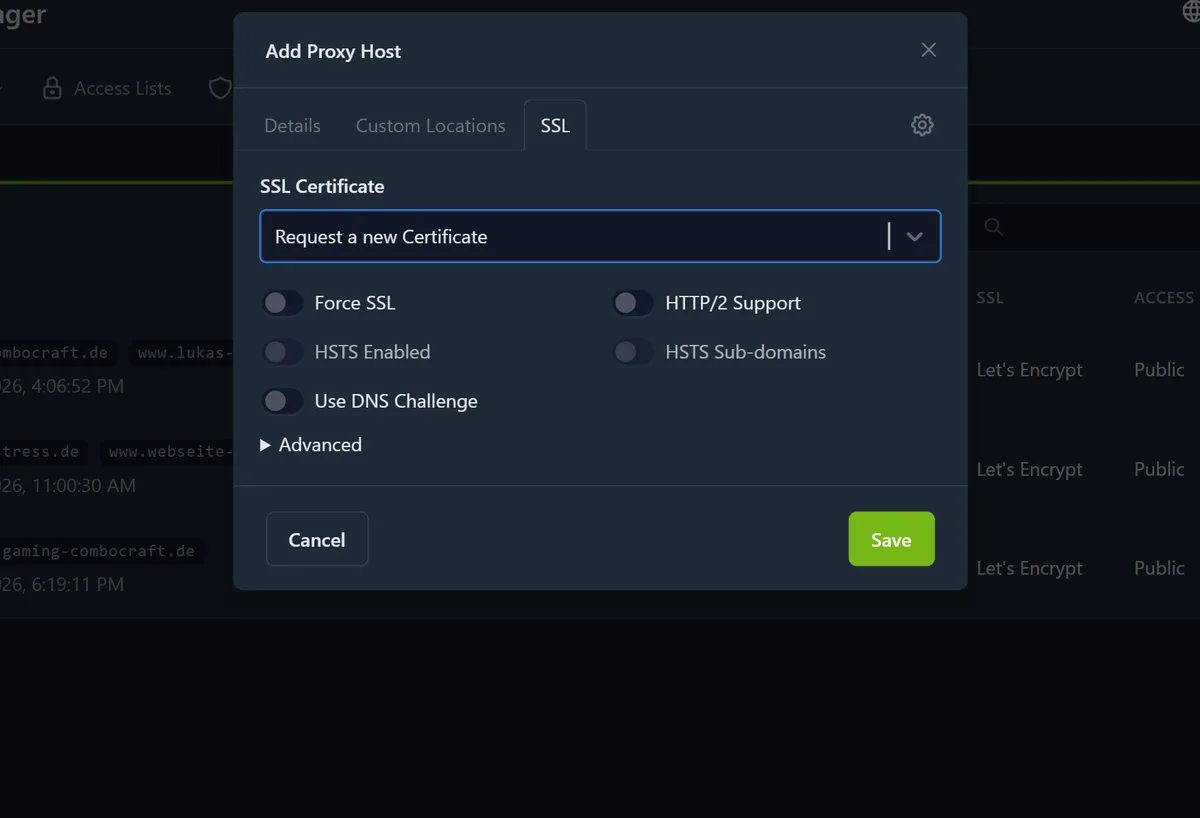
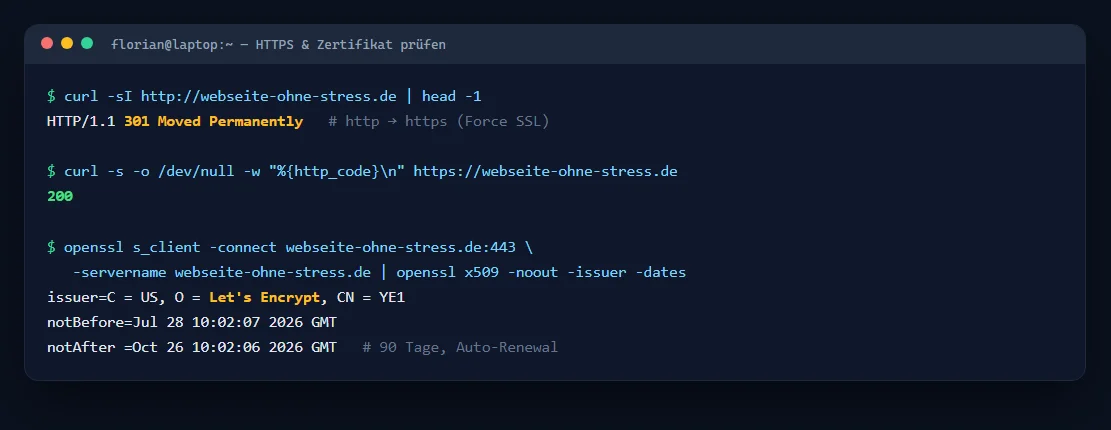
Why is HTTPS a must today? Three reasons: first, it encrypts the connection — nobody can read along between visitor and server. Second, without HTTPS the browser shows a "Not secure" warning instead of the lock icon — that costs trust. Third, Google prefers encrypted sites in its ranking. With Let's Encrypt it costs nothing — so there's no reason left to go without.
Step 5
Briefly: operations — updates & backups
A server doesn't run itself, but the effort is manageable. Two routines are enough to start with:
- Updates: install system updates regularly (much of it is automatic on Ubuntu). Security holes get closed continuously — but only if the fixes actually arrive.
- Backups the 3-2-1 way: three copies of your data, on two different media, one of them off-site. At least one copy must run automatically — anything manual gets forgotten.
Why not keep backups with the same provider only? A backup on the same server is useless if exactly that server fails. That's why one copy always belongs somewhere else. At "Webseite ohne Stress", for example, a backup runs automatically every morning at 4:23 — you never notice it, and that's exactly how it should be.
Tick it off
Your final checklist
- VPS rented (2 vCPU / 8 GB is enough, Ubuntu 24.04 LTS, location Germany/EU) — IP address and root login at hand.
- DNS set: A record
@→ server IP, CNAMEwww→ domain; propagation waited out (ping shows the new IP). - Reverse proxy running: one door for all services, domain entered and forwarded.
- HTTPS active: Let's Encrypt certificate requested, lock icon visible in the browser, HTTP redirects to HTTPS.
- Operations sorted: updates scheduled, automatic backup set up the 3-2-1 way.
Real-world example
What else can run on a VPS like this
The same technology from this guide — VPS, Docker, reverse proxy, HTTPS — also powers, for example, a child-friendly Minecraft server, complete with admin panel, firewall and memory limits. The matching family guide (written for kids + parents, in German): Build a Minecraft server on lukas-gaming-combocraft.de.
Goes well with this: Set up email with your own domain — four DNS records to your own address
Too much tech? I'll do it for you.
Renting a server, DNS, HTTPS, backups — all of that is already taken care of in my hosting offer. You get a finished, secure website and never have to think about any of it.